When I saw the dozens of possible infill patterns available throughout several slicers, I got very confused. Once I realized however that every pattern has a purpose, it was much easier to know which pattern to use.
Whether the pattern’s purpose is strength, flexibility, or simply to look good, infill is a very important part of your print. Once you know what you’re print is going to be, you need to know what pattern is right for your purpose.
Why do you need infill?
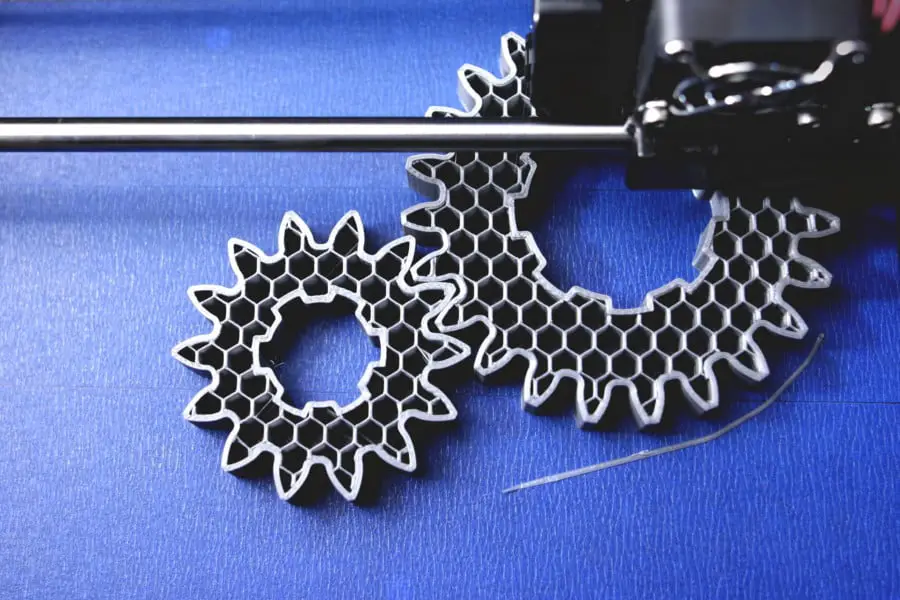
If you’re new to the world of 3D printing, you may be wondering what infill is for. Infill provides the 3D print with internal support as the printer builds each layer. Without infill, printing the top layers would be very difficult, as the plastic would sag over the empty parts of the print.
Besides the actual printing process, infill will affect the strength or feel of the final product. Once you know what your print is going to be used for, you should have a general idea of the pattern and percentage that you want to use.
Infill Pattern Categories
For this article, I’m going to classify each infill pattern under one of five categories. Each of the categories has their own use, and some of the infill patterns might even have multiple categories.
Keep in mind that I’m not an expert, so all of these come from both personal testing and findings from other people’s testing online. There are hundreds of different tests people have run on these patterns, so I encourage you to do some testing on your own.
1. Low Strength
Low strength is for your standard models and trinkets. These are prints that won’t see any sort of functional use, and will probably sit on your shelf or desk.
These parts will probably use a low infill percentage to save valuable time and money. Typically, low strength patterns also have the shortest amount of print time.
The focus of these prints will be speed, which the low strength prints excel at doing. This type of pattern is also great for printer calibration prints since they take the shortest amount of time.
2. Medium Strength
Medium strength infill is for parts that might see a little bit of use, or stuff you print for other people. You could sell low strength parts to people, but then they won’t be very durable.
If you use a medium strength pattern, the parts will generally be able to take a light beating before being totally destroyed. Dropping it on the floor is no problem, but heavy use will wear them down pretty quickly.
3. High Strength
These types of models are prints that will see heavy or functional use. These can include items with moving parts, clips, and hooks, drone bodies, or anything that needs to withstand moderate force.
Obviously, plastic filaments won’t be as strong as metal ones, but they are a cheap alternative that can last quite a while depending on the use.
High strength parts are typically printed with very high infill settings. The parts that need to be extremely strong might even use 100% infill, and at that infill setting the pattern really doesn’t matter anymore.
4. Flexibility
While PLA and ABS are fairly rigid plastics, TPU (flexible) filaments excel with these infill patterns. Usually, these infill patterns are the ones that don’t have overlapping lines, such as the grid patterns.
Unless you are printing with TPU, you probably won’t need to worry about these. Some of the flexible infill patterns do look amazing in time-lapses though.
In reality, you can probably print with any pattern for TPU, but some of them just feel better for flexibility than others.
5. Vanity
Vanity patterns have no purpose other than to look good for the camera. These patterns are mostly crazy shapes and lines that provide nothing for strength.
Some of these vanity prints can also double as strength prints, though. These prints take longer though, so they probably aren’t worth it for the average print.
They also take longer to print than other patterns, due to the crazy movements the printer has to make on each layer. Unless you are doing a timelapse or you are just showing off some cool patterns to your friends, stick to the standard patterns.
Infill patterns of 3 slicers
Every slicer you use is going to have different infill patterns. Some are common throughout all slicers, but others have some very unique patterns.
In this section, I’ll give you a brief overview of three slicers’ infill patterns. In case you want even more information than that, I’ll go into more detail about some commonly used patterns after this section.
I also put some graphics together to show you the different patterns each slicer has to offer.
Simplify3D

While Simplify3D has the least amount of infill patterns, it includes the patterns that you’ll end up using the most. Personally, this is my favorite slicer, but also my least favorite when it comes to patterns.
For a paid program, it definitely needs to add many more patterns. It doesn’t lack any other settings though. If you need some cool looking patterns for time-lapses, you might want to check out the other slicers’ patterns.
- Low Strength
- Wiggle
- Medium Strength
- Rectilinear
- Fast honeycomb
- Full honeycomb
- High Strength
- Grid
- Triangular
- Flexibility
- Wiggle
- Vanity
- Wiggle
Cura
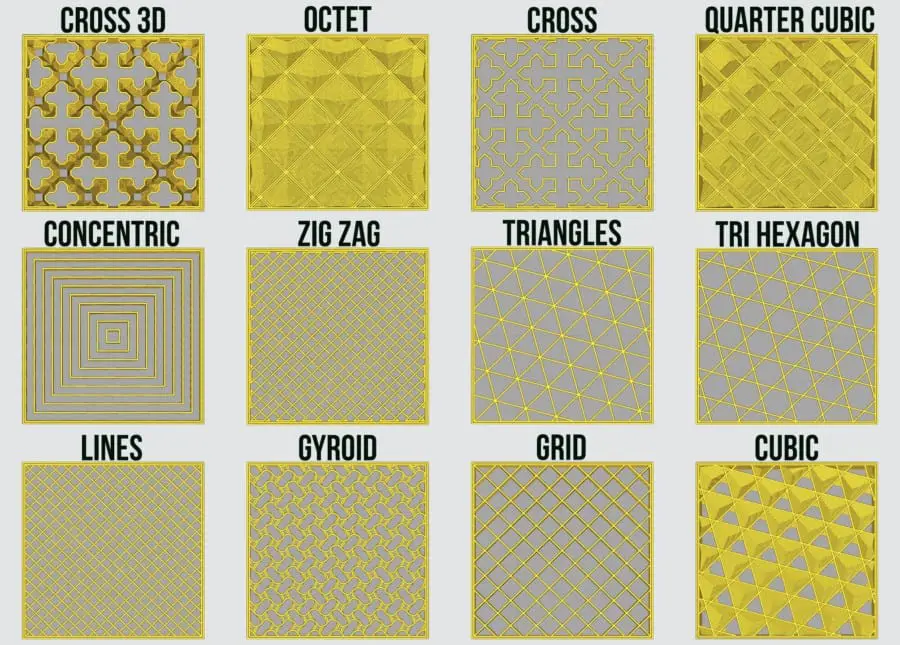
Cura is my second favorite for infill patterns. It has the same amount that Slic3r does, but some are so similar that you probably won’t ever use a lot of them.
It’s a free program, so you could use both this and Slic3r to experiment with a ton of new patterns.
Some of the patterns on this list I learned from a great 3D printing site called All3DP, which helped me learn a lot of new info about 3D printing.
- Low Strength
- Lines
- Medium Strength
- Octet
- Quarter Cubic
- Gyroid
- High Strength
- Cubic
- Cubic Subdivision (not included in patterns image)
- Triangles
- Tri-Hexagon
- Grid
- Felixible
- Concentric
- Cross 3D
- Cross
- Lines
- Vanity
- Concentric
- Cross 3D
- Gyroid
- Cubic Subdivision
- Cubic
- Octet
Slic3r
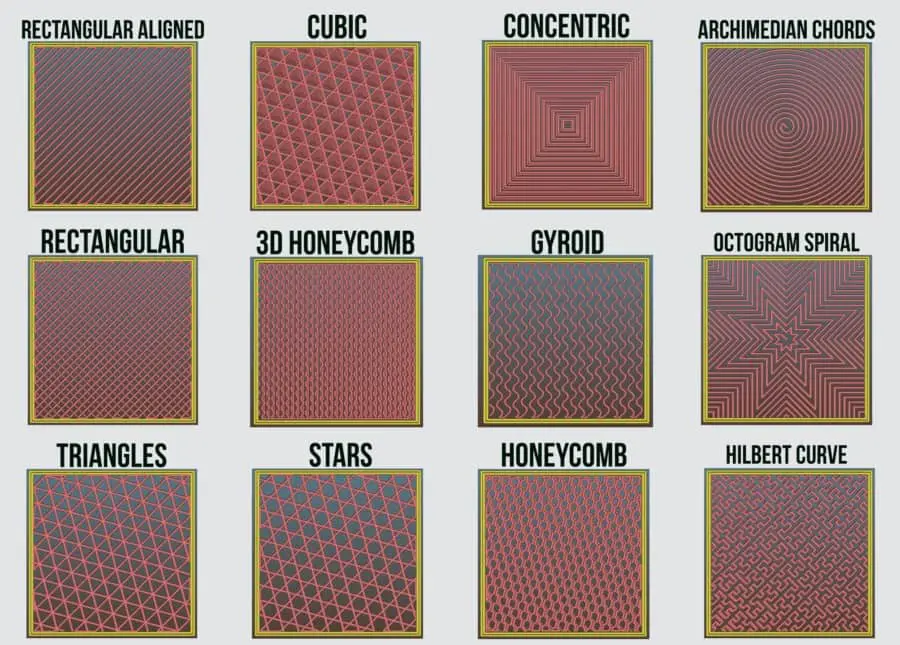
Slic3r isn’t my favorite slicer, but it does by far have the best infill patterns. While a lot of them are vanity patterns, some of those patterns can also be used to strengthen prints as well.
Timelapses with some of these patterns look amazingly satisfying. The program is free which makes it even better.
- Low Strength
- Rectangular Aligned
- Medium Strength
- Honeycomb
- 3D Honeycomb
- Gyroid
- Grid (not included in patterns image)
- Archimedian Chords
- Octogram Spiral
- High Strength
- Cubic
- Rectangular
- Triangles
- Stars
- Felixible
- Concentric
- Cross 3D
- Cross
- Vanity
- Concentric
- Cross 3D
- Gyroid
- Archimedian Chords
- Hilbert Chords
- Octogram Spiral
Infill Density
The density of your infill makes a huge difference in the weight and durability of your print. A low infill print will feel cheap and weak, while higher percentages feel heavier and strong.
When you print with flexible filaments, the amount of infill you use will determine how “squishy” the print feels. Higher infills with TPU will be more rigid.
If you are printing high-quality models for customers, you want to use a higher infill density while using a faster pattern. This allows it to print faster while still feeling heavy enough to not feel cheap.
As soon as you know what the print will be used for, you can choose an infill pattern and density. Strength patterns will be higher (sometimes even 100%).
For prints that you will be using for display, try to print with as little of an infill percentage as possible. Joel the 3D Printing Nerd made a great video about this topic.
External Fill Patterns
Another setting to watch out for is the external fill pattern. What this setting does is affect the way the printer fills in the top layers.
You can give your prints a cool finish by making your printer create some cool designs on the external top surface. For detailed models, you generally should leave this at the default setting.
Simplify3D has only 2 options for external fill patterns, but Slic3r has 5. Slic3r also allows you to change the top and bottom layer fill patterns separately, while Simplify3D changes both by default.
Other Infill Settings
As you’ve probably noticed in your slicer settings, there is another infill option referred to as infill rotation.
What this feature does is rotate your infill to a certain degree every layer, causing the infill angle to change. This is useful for creating stronger prints, and also can look great on a timelapse.
You can also choose to add a solid diaphragm every x number of layers to provide extra strength. Combine infill is a setting that helps make your print even stronger and can help make sure the layers won’t separate as easily.
My Favorite Infill Patterns
Wiggle
This pattern consists of single wavy lines going from one side of the print to the other. It is the most popular Simplify3D pattern for both flexible prints and low strength models for good reasons.
The first is that it prints much faster than any other infill patterns. For smaller prints, it won’t matter much, but it’ll make a huge difference for the large ones.
The smallest amount of movement the print head has to do the better. There is also less chance of a print failure when there are fewer movements on each layer.
The second is that it works great with flexible filaments. The parallel wavy lines collapse nicely, giving it a more flexible feel. It’s also a cool filament to use with time-lapses if you use the infill rotation setting.
Honeycomb
Honeycomb infills just have a really cool look to them. Honestly, I don’t see much of a difference between fast honeycomb and full honeycomb, besides the obvious speed factor.
While it is nothing special for TPU filament, the 3D honeycomb can also look really cool for time-lapses.
It may not be the fastest infill pattern you can use, but it’s definitely one of the most fun. Sometimes I’ll just stand and watch my printer as it creates the perfect honeycomb shape in the interior of my print.
It is also a medium-strength infill (some people say it’s high strength), so it provides some good strength, though it’s not as strong as Triangular.
Gyroid
The Gyroid pattern has got to be one of the coolest you can use. While not fast by any means, this spinning infill pattern is extremely fun to watch in time-lapses.
This fills a lot of area inside the model, making it less optimal for TPU. As a medium strength filament, it can be used quite readily throughout a ton of different types of prints.
Overall it’s a very satisfying filament to use and doesn’t get old very easily.
Triangular
The infill pattern I probably use the most is Triangular. These patterns are some of the best for high strength prints while still printing at good speeds.
The triangle shape is just known to be extremely strong geometrically, and it definitely shows in the print quality. It’s also decent as a flexible pattern, as the triangles can compress nicely.
It can get old fast using this in a timelapse, but it’s a great pattern to use when you aren’t sure which one to do.
Conclusion
Infill is a hugely important part of any print you’ll do, but you need to know the right settings to use. When it comes to infill patterns, I think Slic3r has the most creative types. If you are into time-lapses or just want really cool looking patterns on your print, you should use this slicer.
Cura is a close second, but some of its patterns are too similar. Simplify3D greatly lacks in this area, especially for a $150 price tag. I prefer this slicer for most prints, but I don’t use it for the cool pattern effects.
There really aren’t any major differences between any of these, as you could make your print succeed with all of them. It all comes down to a matter of preference and optimal print times.